

Import Students
You can import a batch of students if you want to add or update multiple Students at the same time, rather than individually.
You may want to import Students at the beginning of the academic year, when you have a large number of Students to add to the system at once.
When you import students, they are all added to the Students List, which means that you can view them in the Students List or Change Student details as and when required.
If you want to add students individually, you can create a new student by following the steps mentioned in the 'Create Student' section for adding each new user.
**Please note**
We have introduced new templates based on your school type. You may see some minor differences in your school's template. You can continue to use original (legacy) template if you prefer. More information is available here.
To import new and/or bulk update students
The most efficient way to update your Students List is by first exporting your existing student list as a CSV, making any amendments before re-importing to Testwise.
1.Using the import template provided in Testwise. Ensure that the students you wish to update are in the Testwise Import Template.
2. Edit your Students List in the .csv file, as required. Note: The unique identifiers in your file must match the ones on Testwise in order to update a student. If a different unique identifier is used, then a new student record will be created.
3. Once you are happy with your updated list and it is ready to be imported, click on the Students button  on the home screen.
4. Click on the Import Students button ![]() to display the Import Students page.
to display the Import Students page.
*Please note, we have introduced new templates based on your school type. You may see some minor differences in your school's template. You can continue to use original (legacy) template if you prefer.
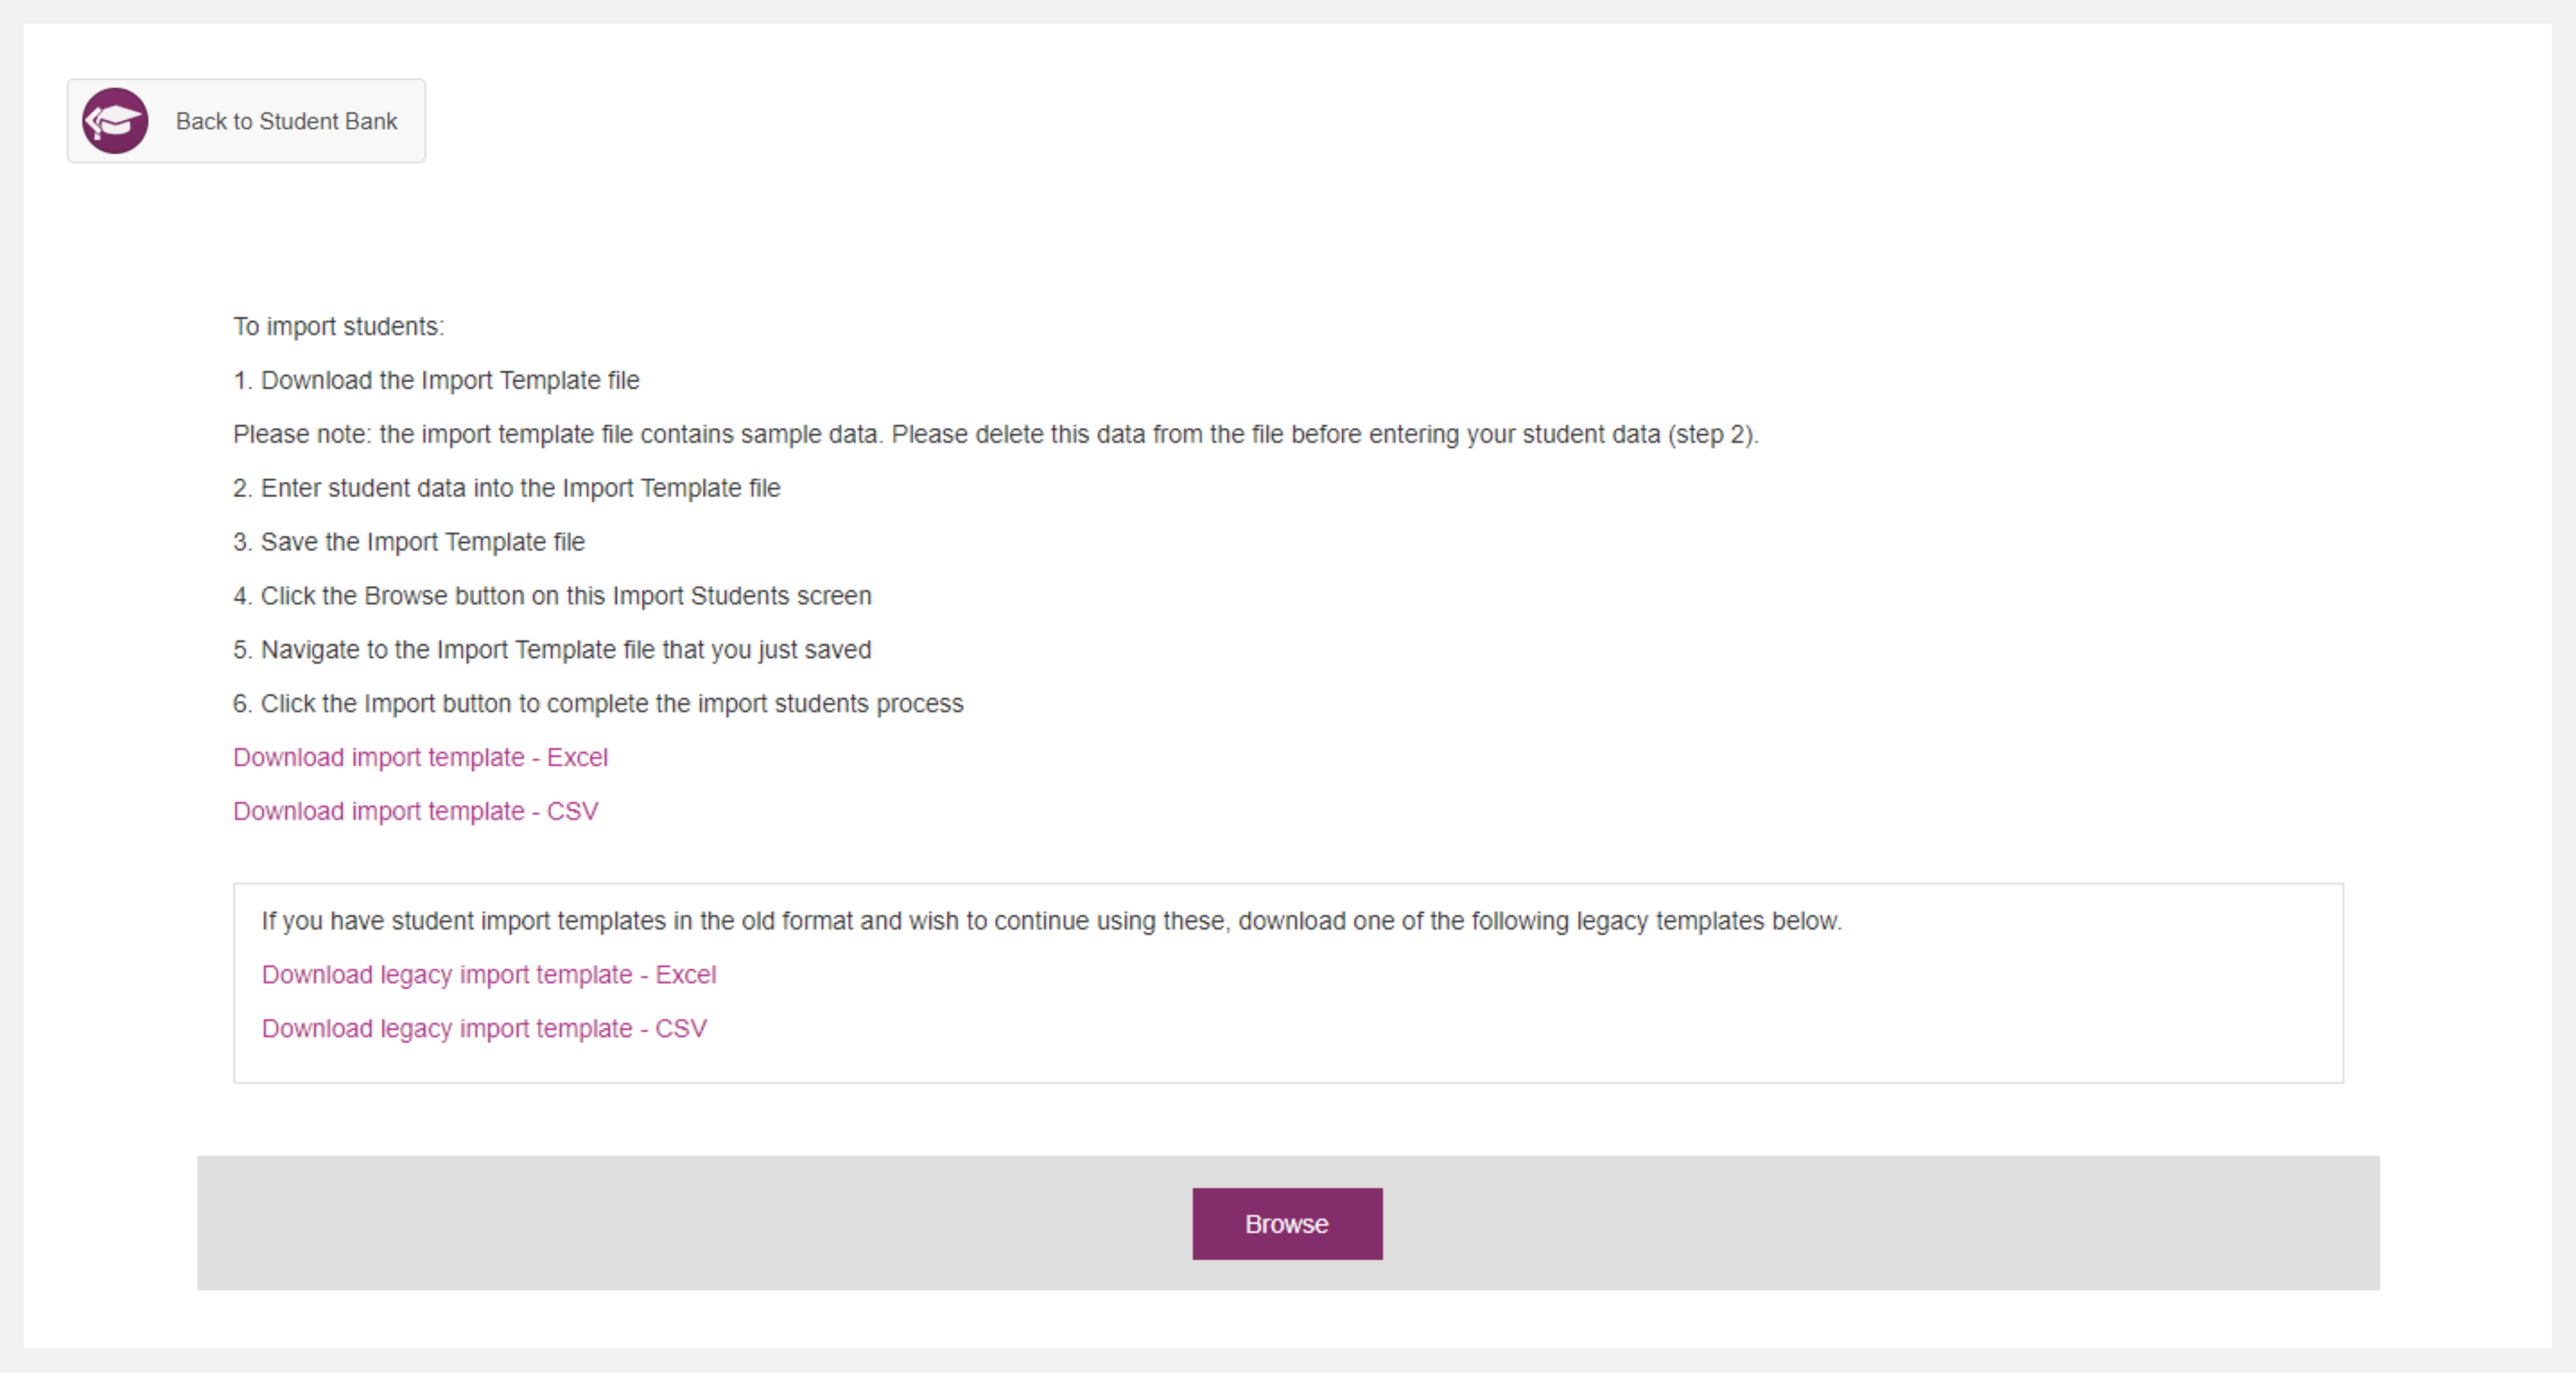
5. Click on Browse to display the 'Choose File Upload' box. Then navigate to the .csv file on your system that you would like to import and then click on the Open button.
6. Verify the student details displayed on this page and click the Import button  to complete the updation process.
Note: Student data imported into Testwise from the .csv file will be coloured blue and considered updated, even if you have not made any changes to every student record.
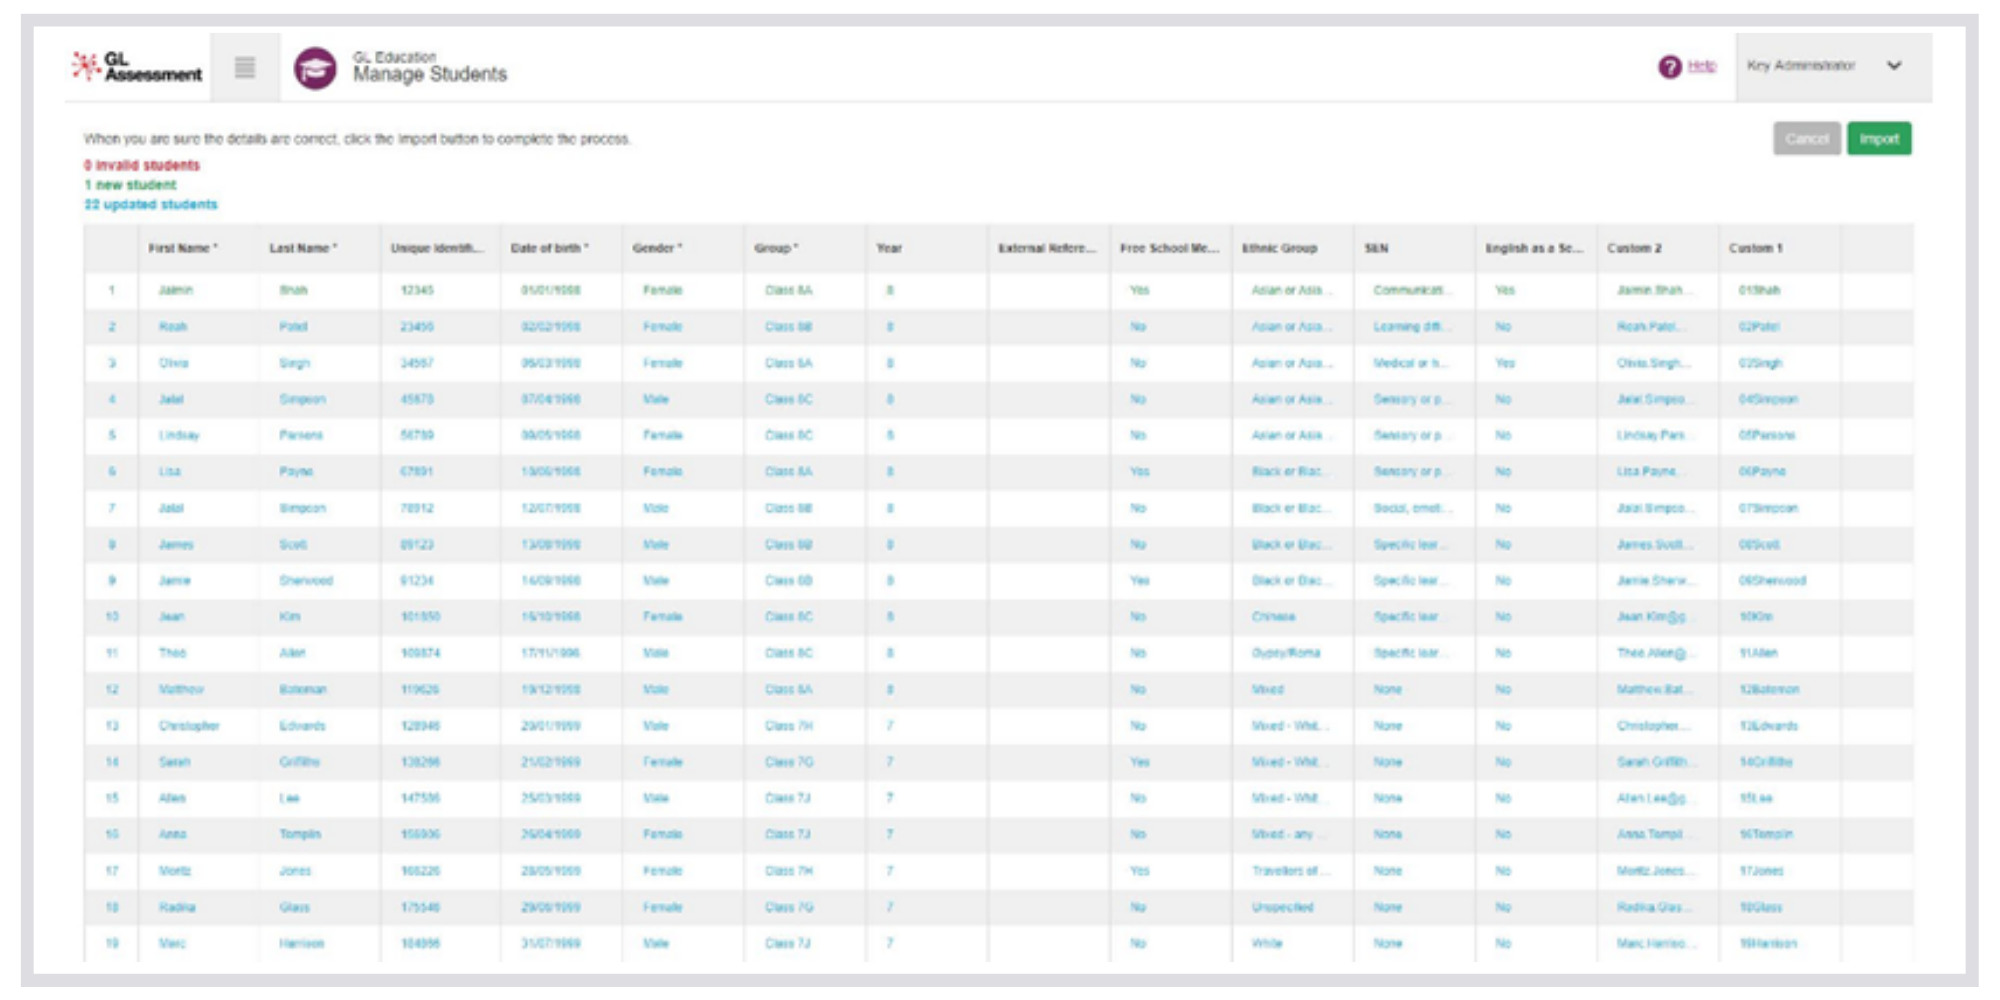
Note: If the data has not passed the verification process, the Import button will change to 'Retry'.
To correct the errors in the data:
a. Identify exactly where the errors are by finding the fields highlighted in red within the data grid. Scroll through the full list of Students to find all the errors. The data that is missing or incorrect will have a red box around it. To find out more information about each error, hover your mouse over the red warning marker shown in the last column of the row.
b. Open MS Excel (or the CSV editing software). Open the file containing the errors.
c. Correct the errors in the file.
d. Save your changes.
e. Click the 'Retry' button.
f. Repeat step 5 mentioned above.
7. Click Import if the changes highlighted in the summary are correct.
Note: If you are not happy with the changes in the summary page, you can simply edit the file again and re-upload.
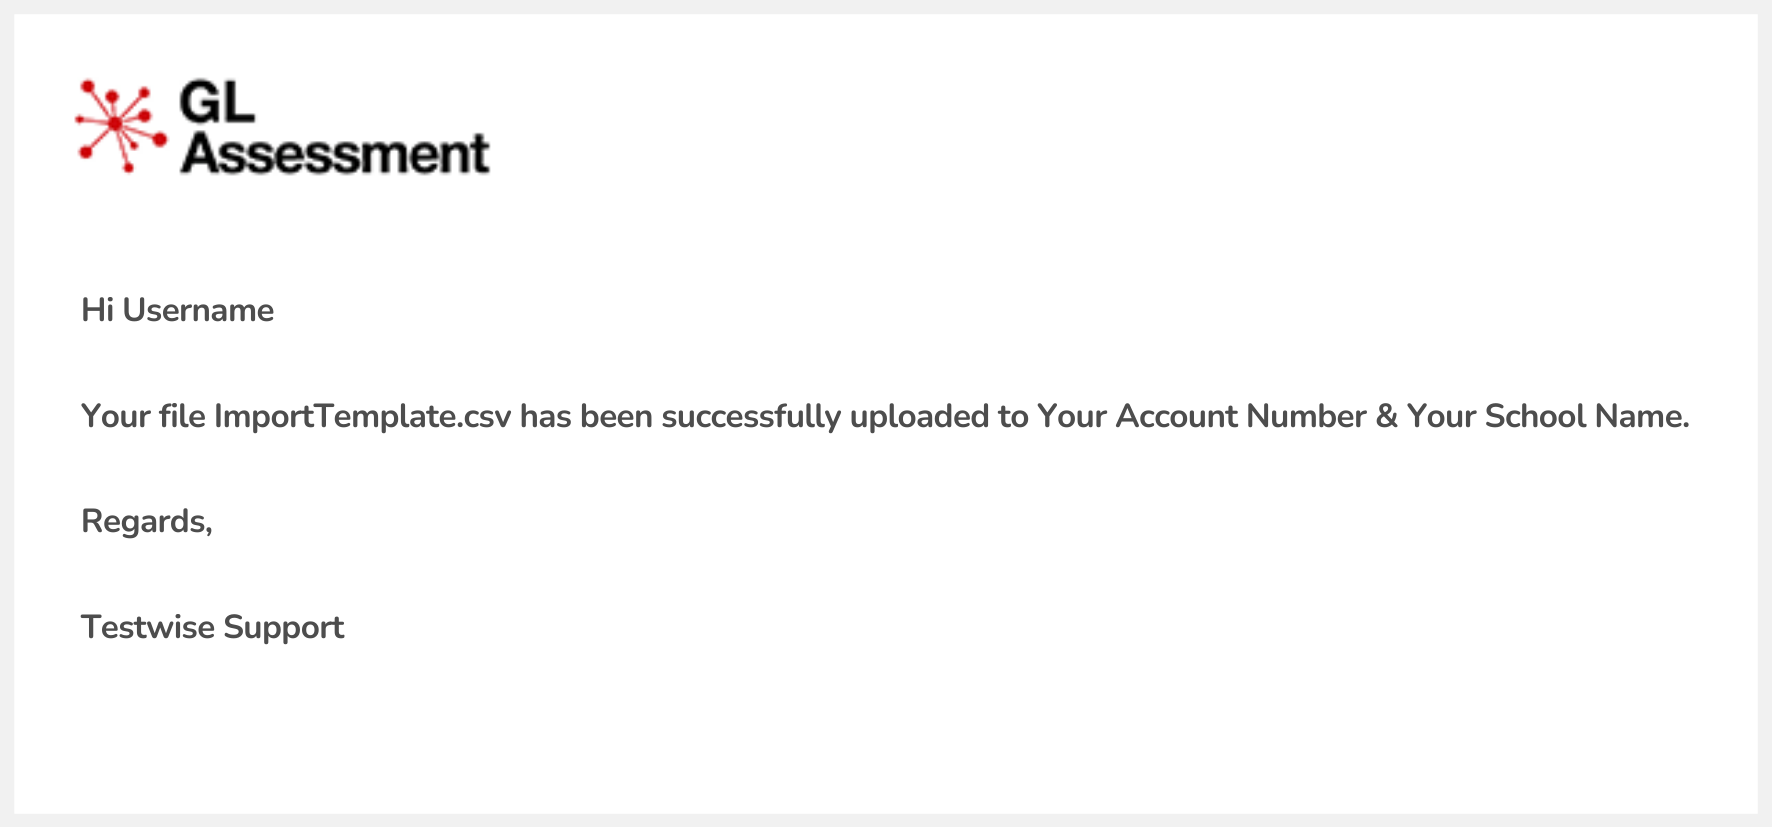
8. Once your updated file has been processed, you will receive an email confirming that your file has been uploaded successfully. The following message will be displayed.
9. Now that you have received confirmation of your updates/import, you can return to the Student list to check changes.
10. To return to the home screen, click on the Home button.